Quick Start Guide
This guide walks you through your first session on Dialer.CX — from logging in to making your first call. Follow these six steps and you will be handling calls within minutes.
Step 1: Log In
Section titled “Step 1: Log In”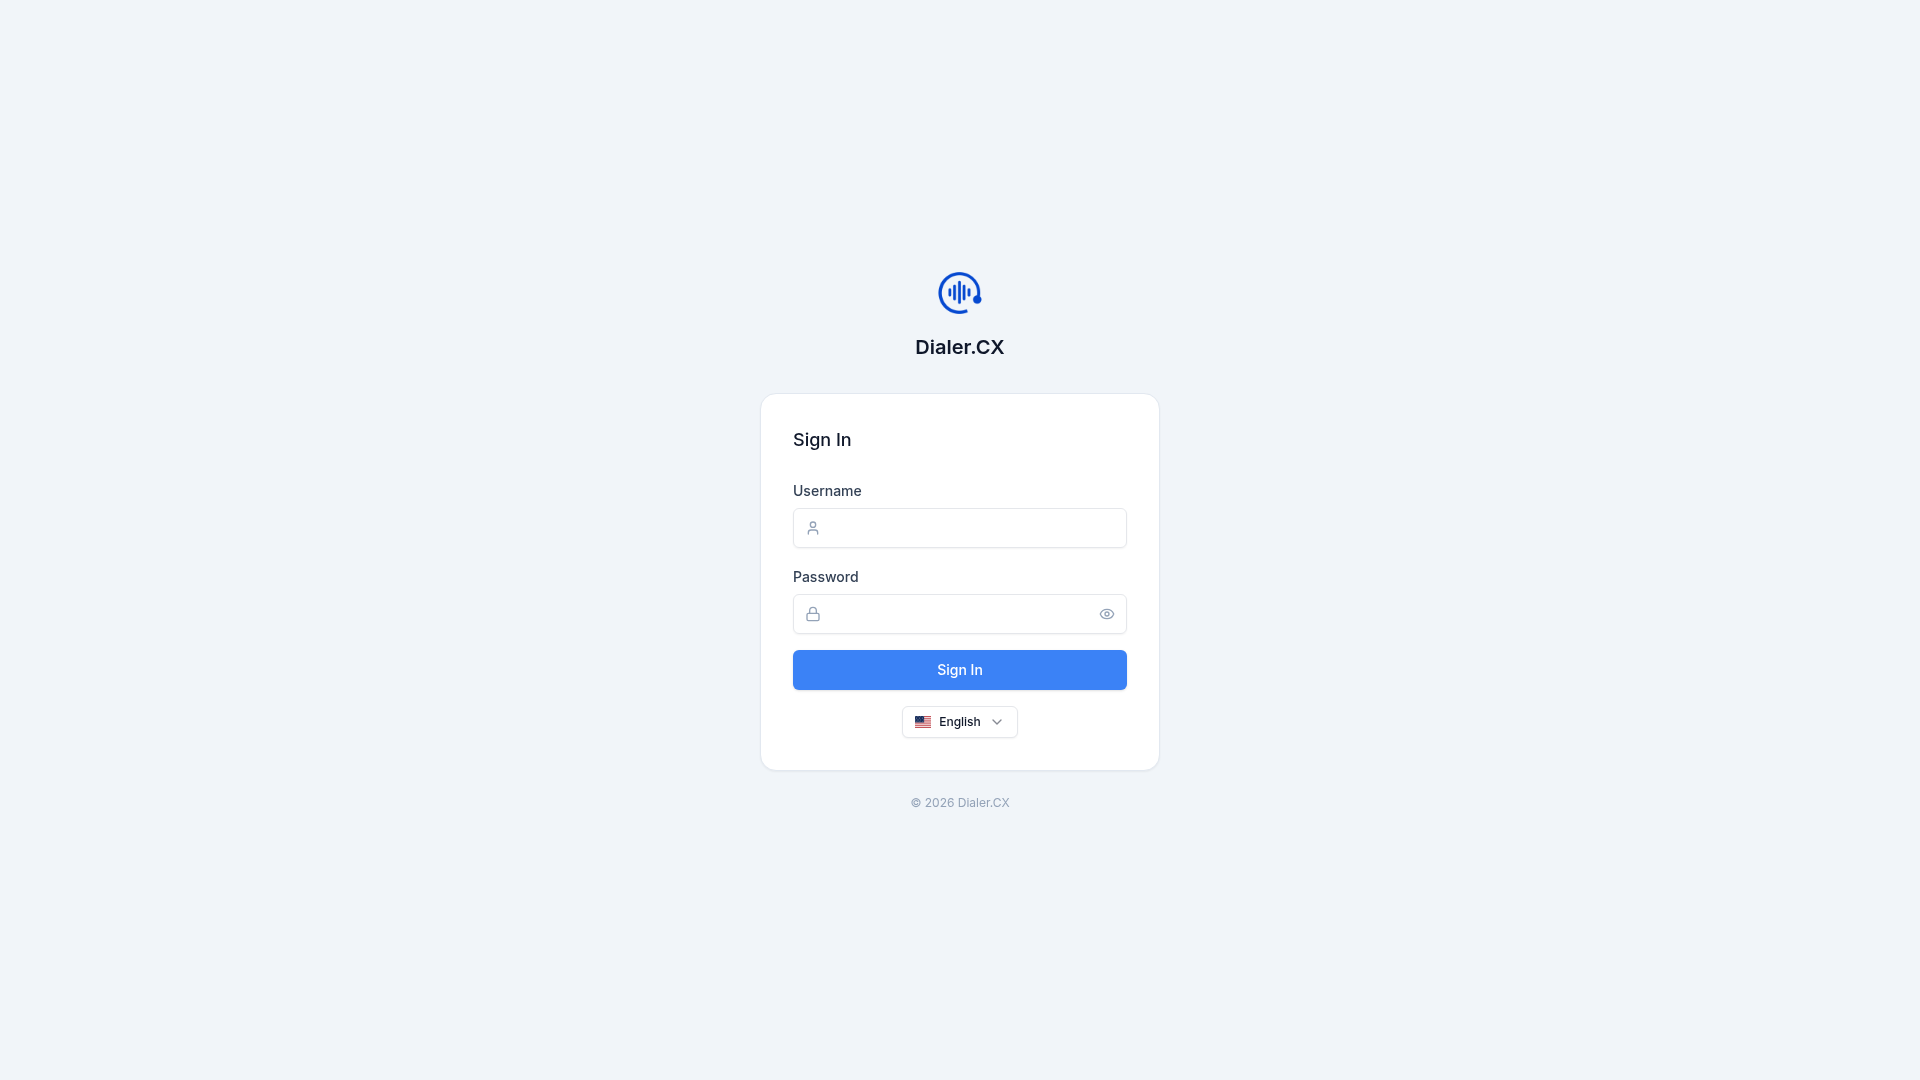
- Open your Dialer.CX URL in a modern browser (Chrome, Edge, or Firefox recommended)
- Enter your username and password
- If two-factor authentication is enabled, enter the code from your authenticator app or email
- You will land on your Dashboard
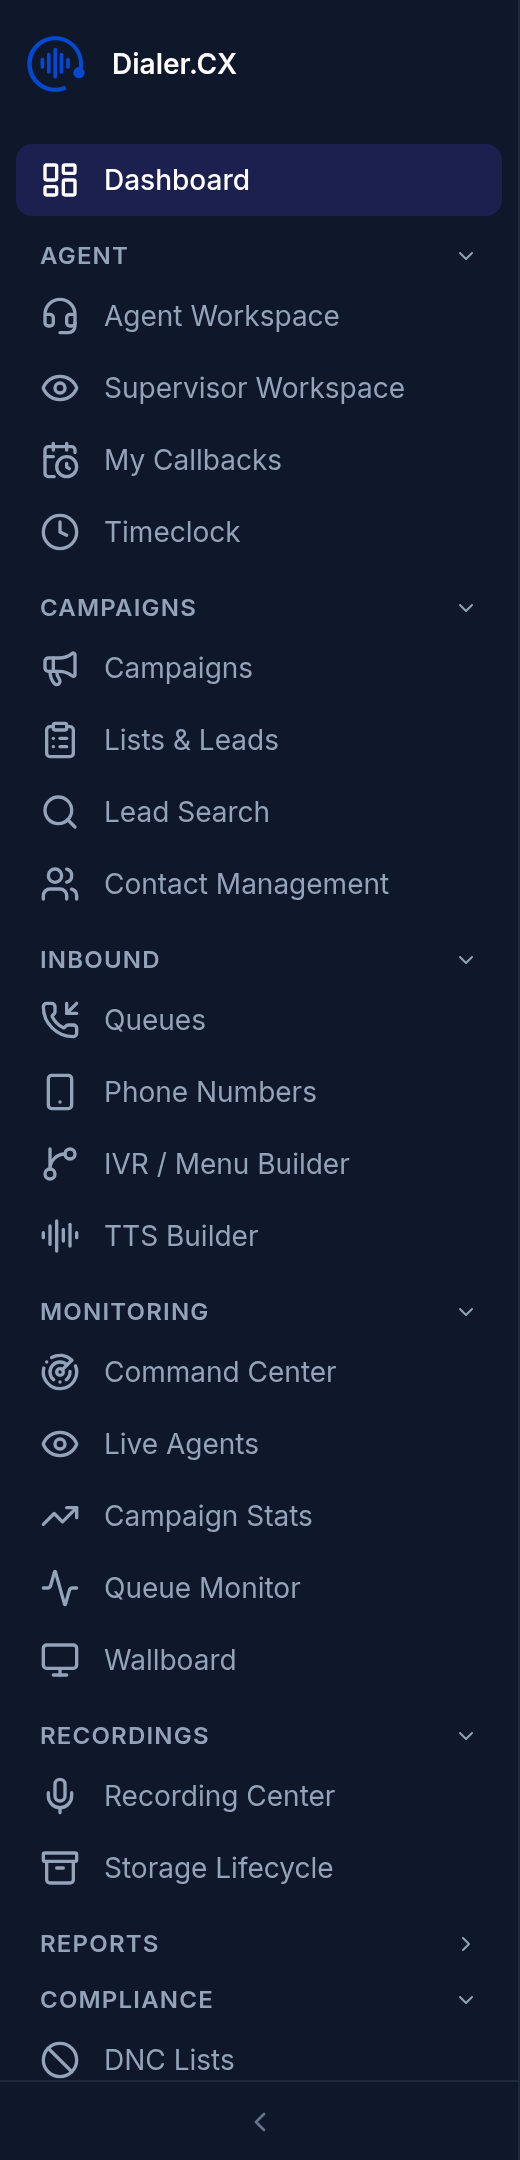
Step 2: Navigate the Interface
Section titled “Step 2: Navigate the Interface”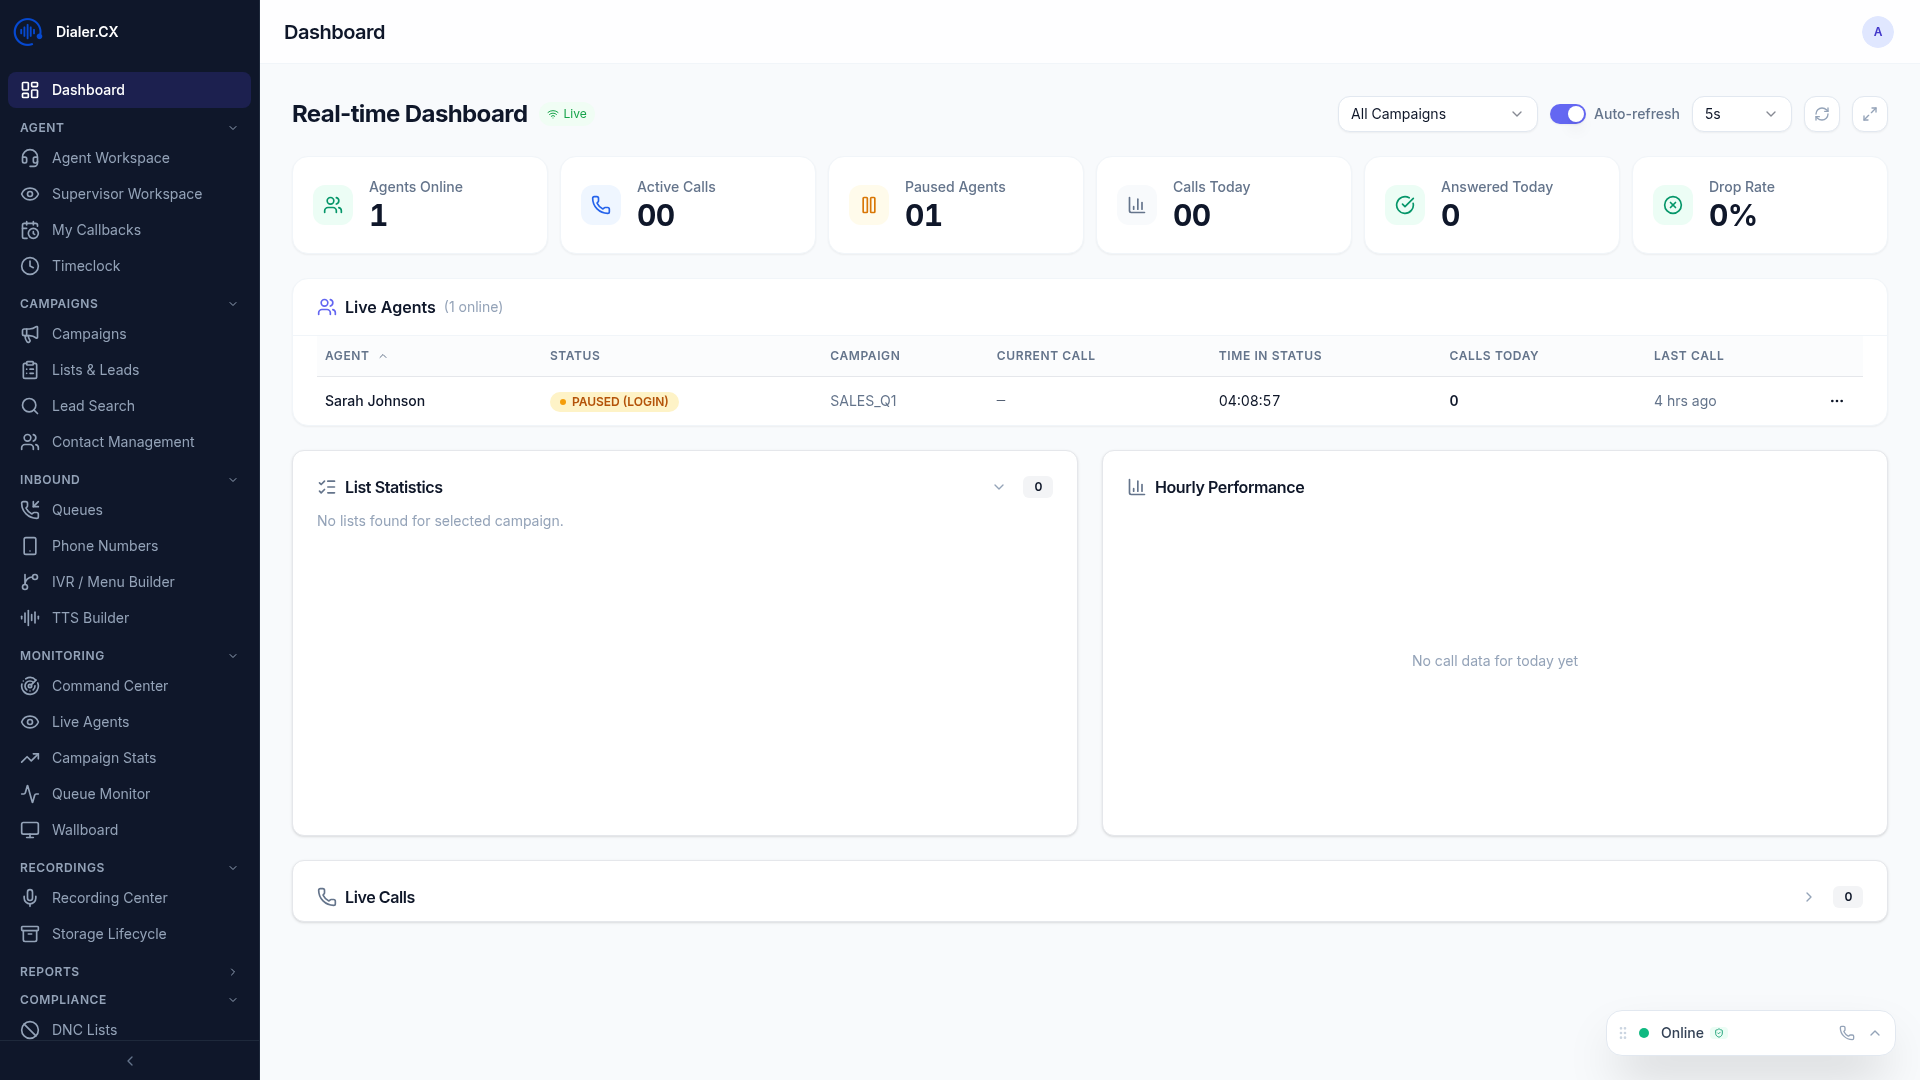
The left sidebar is your main navigation. What you see depends on your role:
- Agents see: Dashboard, Agent Workspace, Callbacks
- Supervisors add: Monitoring, Recordings, Reports, Wallboard
- Managers add: Campaigns, Lists, Contacts, Inbound settings
- Admins see everything, including Settings, Users, Telephony, and AI configuration
Step 3: Set Up Your Phone (Agents)
Section titled “Step 3: Set Up Your Phone (Agents)”If your account is configured for the browser softphone:
- Look for the phone widget in the bottom-right corner of the screen
- Your browser will ask for microphone permission — click Allow
- The widget shows a green dot and “Online” with a “Secure” badge when connected
- You are ready to make and receive calls
Step 4: Join a Campaign (Agents)
Section titled “Step 4: Join a Campaign (Agents)”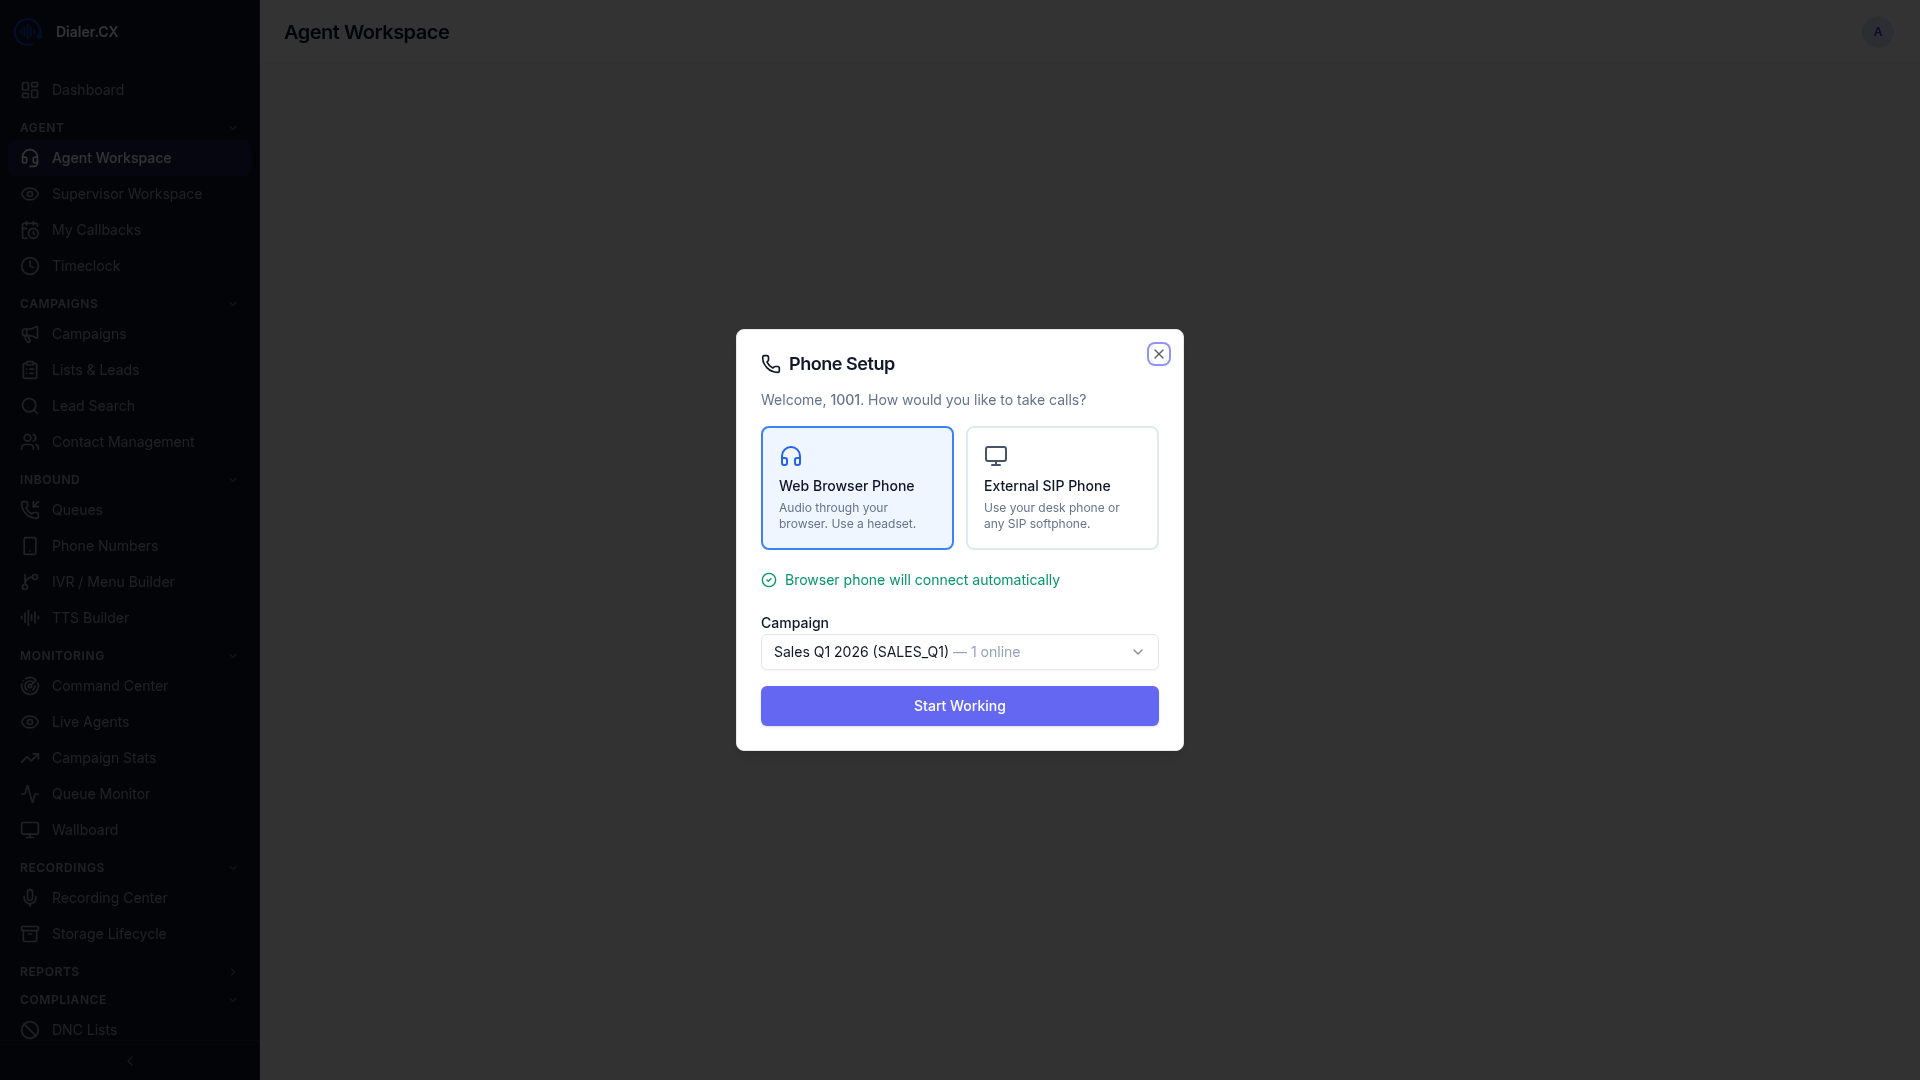
- Navigate to Agent Workspace from the sidebar
- Select your campaign from the dropdown
- Click Log In to join the campaign
- Your status changes to READY — you will start receiving calls based on the campaign’s dial mode
Step 5: Handle Your First Call
Section titled “Step 5: Handle Your First Call”When a call connects:
- The lead information panel shows the contact’s details (name, phone, address, custom fields)
- The script panel displays your talking script (if configured for this campaign)
- Use call controls to hold, mute, transfer, or hang up
- After the call ends, select a disposition to categorize the outcome
- Your status returns to READY for the next call
Step 6: Take a Break
Section titled “Step 6: Take a Break”- Click the Pause button in your workspace
- Select a pause code (Break, Lunch, Training, etc.)
- Your status shows PAUSED — you will not receive calls
- Click Resume to go back to READY
What’s Next?
Section titled “What’s Next?”Now that you have completed your first session, dive deeper into the platform:
- Agent Workspace — deep dive into all workspace features
- Browser Softphone — phone widget details and audio settings
- Dispositions & Callbacks — learn disposition codes and callback scheduling